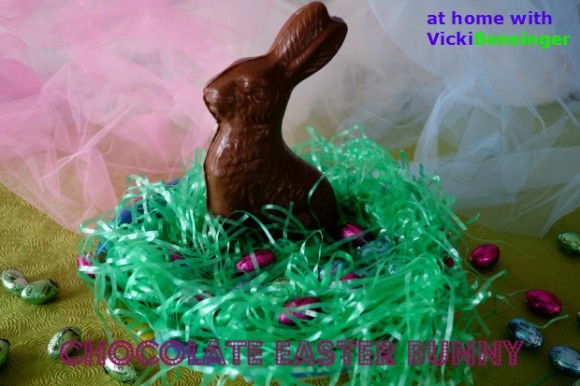
Homemade Chocolate Easter Bunny
When I was a little girl I would get so excited when the chocolate Easter bunnies would arrive in the stores. I always wanted the biggest one! Of course, even being the chocoholic that I am, and was, even at that age, I could never finish those monstrous size bunnies.
I love bunny rabbits. I’m sure my adoration for them came during Easter when Famous & Barr (department store) would have their Easter bunny event with a HUGE tent filled with live bunny rabbits of all kinds. It was definitely a highlight of my childhood memories. Then when I was older my family got a gray bunny named Shannon who thought she was one of the dogs. Then later I purchased a bunny I called Cinnamon. They’re really so sweet and cuddly, just as you might imagine.
Now that I’m older, when Easter is just weeks away I think about our bunny rabbits and those big chocolate bunnies. I’ve purchased them hollow and solid, and although the hollow ones are easier to devour, I still prefer the solid bunny.
If you’ve never made a chocolate bunny or mold, they can be made 2 ways that I’m aware of. One by tempering chocolate, in which case you can purchase your favorite chocolate to mold. This method is somewhat laborious and the average person typically prefers not to spend their time tempering.
What is tempering? Tempering is a conditioning process that involves the controlled cooling and heating of melted chocolate to promote the formation of small stable cocoa butter crystals. Correctly tempered chocolate with small stable crystals will produce finished products with excellent gloss, snap, texture and bloom resistance.
The second way is by purchasing confectioners compound/coating which requires zero tempering. This method I used today, since I felt all of my readers could easily duplicate, without a hiccup.
What is a compound? A compound is a blend of sugar, vegetable oil and other products, which may or may not include cocoa powder and/or chocolate liquor. Since they do not contain cocoa butter, compounds do not require tempering. Compounds are not defined by the U.S. Food and Drug Administration Standards of Identity; therefore any number of compound coatings can be developed with a variety of flavors, colors and performance based on the fat system used.
Confectioners Compound/Coating can be found at baking supply stores, kitchen and craft stores. Some varieties I’ve sampled taste marginal at best. The variety I purchased was so delicious, I couldn’t tell the difference between this, and the real deal. The quality of the Confectioners Compound was smooth and silky to taste, and uses a high quality cocoa powder. In place of cocoa butter the manufacturer uses palm kernel oil, hence, the reason for no tempering. My bunny mold has a smooth, silky gloss finish – making it so inviting to eat!
This year instead of purchasing a store bought chocolate bunny why not make your own? A trip to the baking supply store for some plastic molds (inexpensive $1-$5)) or for long lasting uses a poly-carbonate mold ($30 – $100) will be needed along with your Confectioners Compound. It’s so easy.

Oh and if you’re really into being creative you can even decorate your bunny with colored Confectioners Compound for the eyes, clothing, ribbons, etc.
Here’s how it’s made…..

Homemade Chocolate Easter Bunny
Put a smile on someone's face with this adorable Homemade Chocolate Easter Bunny. So simple to make and so rewarding!
Ingredients:
- 2 pounds Confectioners Compound/Coating
- Bunny molds (my bunnies were 8-inches tall and plastic molds)
Directions:
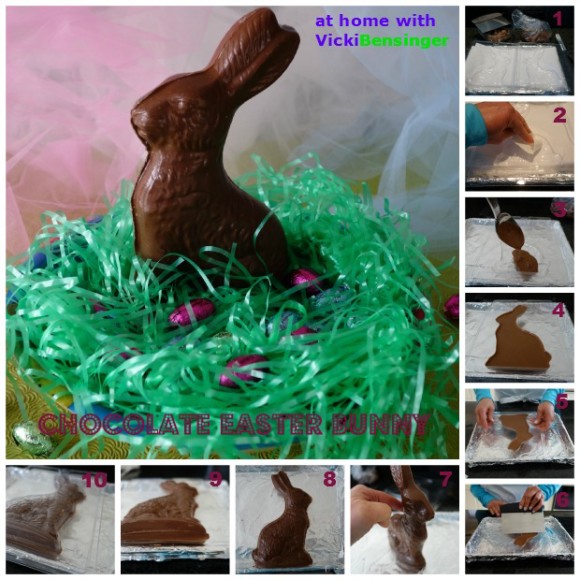
- Using a sheet tray, set one mold over the edges so mold is lying flat.
- With a dry cloth wipe out the inside of each mold to insure it's dry and clear of any lint or debris.
- Using a microwave save bowl, melt 1 pound of Confectioners Compound for three 30 second intervals - stirring between each interval until thoroughly melted.
- Remove from microwave, stir again to incorporate and cool a bit, then spoon or pour Confectioners Compound into 1 half of the mold, leaving approximatly 1/16 - inch clearance at the top edge.
- Gently tap mold onto rim of pan to remove air bubbles.
- Using a bench scraper, run over the top to insure edges are clean.
- Place mold - setting on sheet pan, in the refrigerator to chill for 30 minutes. Remove from refrigerator, carefully flip mold over - chocolate bunny half will pop right out. Set aside.
- Repeat step 1-6 with the other half of the bunny mold. Then carefully set 1st bunny half gently on top of the melted second half of mold.
- This will glue the 2 halves together.
- Set mold over the hardened bunny to cover and place entire mold, (hard and melted on sheet tray) into the refrigerator for another 30 minutes.
- Remove from refrigerator and pop out. Now you have a perfect bunny.
Note: If a little Confectioners Compound leaks out this can easily be trimmed once chocolate hardens.
Enjoy!!!
 Hi, I’m Vicki Bensinger! I have been teaching culinary classes throughout Missouri since 1992. I offer personalized private culinary classes for individuals and small groups in the comfort of your home or organization.

OMG!
Super cute and adorable!
Thank you Asmita. They were fun to make. Now I just need to perfect my cookie decorating skills like you.
That’s a FANTASTIC job, Vicki.
Happy Spring!
Angie
Thanks. Happy Spring to you as well! It’s in the 30s here so spring hasn’t really arrived yet.
Very fun Vicky, a great tutorial. I bet these taste better than the ones at the market too!
These taste great. I’m sure if you go to the trouble to select your favorite chocolate and temper it that may taste even better. That said, these are yummy, you should make them with your grandkids, they’d love them. Glad you enjoyed the tutorial.
Perfectly done!!! I’m so impressed!!!
Thank you Liz. Although there’s really nothing to impressed with. It’s so simple even a child could do it without any problem.
Thank you so much Vicki for your fabulous tutorial! You right the home made chocolate Easter Bunny just taste better.
I hope you’ll try this, it’s so easy.
Really cute! Who doesn’t want to bite the ears off a chocolate bunny at Easter? And I agree the solid ones are much better than the hollow. Really great tutorial — thanks.
Yes you’re right the ears are the first thing to go. Poor bunnies. Glad you liked my tutorial. My plan was to make a video but when I went to shoot it I realized my camera was out of juice. Next time I’ll be sure to plug it in when I’m done using it.
You made the bunny?! How clever and cute of you! 🙂 ela
Thank you so much Ela, it was so much fun to make and so simple. I hope you’ll try it.
So cute and for sure much better tasting than the ones bought at the SM.
Great tutorial, thanks!
Glad you like my bunny & tutorial. Thanks for stopping by.
What a perfect chocolate bunny!!! These are my favorite Easter treats. Thanks for the instructions!
You won’t believe how easy this is. All you need is a mold and confectioners coating.
Now, this is a great Easter Bunny. I wouldn’t mind popping these in my mouth! Thank you for sharing this wonderful treat. 🙂
You’re welcome. I hope you try making these.
Wow, homemade Easter bunny…I love the tutorial Vicki…what a perfect treat.
Thanks for the post…hope you are having a great week 😀
Thanks Juliana. They’re yummy and easy to make.
Whoa, this is homemade!!! What a beautiful and perfect Easter bunny!!! It must be fun making easter chocolate at home… the final chocolate amount is down to half by the time I complete it.
Yes I know it’s hard to resist eating the chocolate but since I was blogging about it I had to restrain myself. Of course now it’s been broken and nibbled on. As John KR mentioned, the ears went first.
Your kids would have fun making these Nami. You should give it a try.