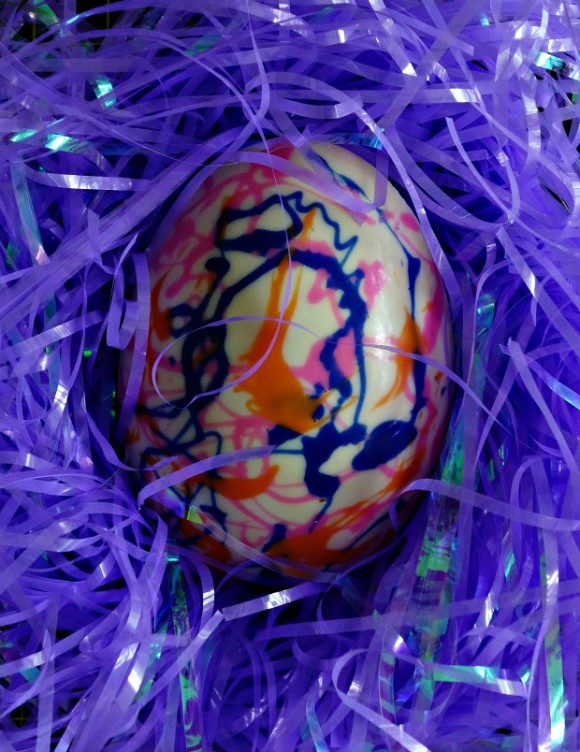
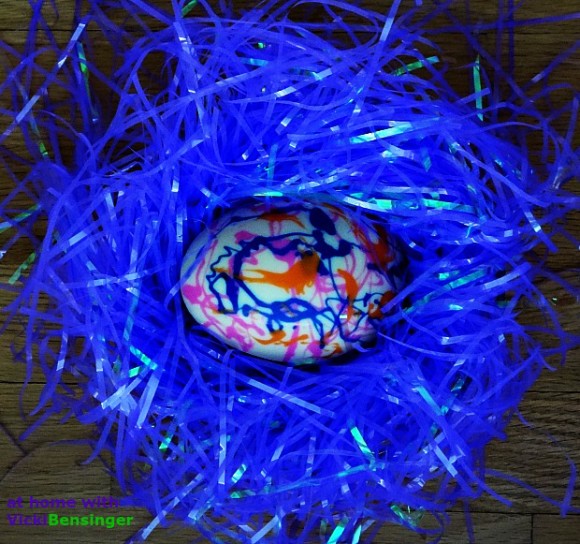
Splatter Painted White Chocolate Easter Eggs
When I was a little girl they use to have the Easter Farm in the parking lot of a mall called Westroads (that no longer exists) here in town . Each year my sisters and I couldn’t wait to go to see all the little chicks, ducks and bunnies – it was so much fun! Children and their parents would be packed inside a tall, long, tent in celebration of Easter coming.
After our visits we would go home and color eggs, in so many beautiful colors.
Coloring eggs for Easter has certainly come a long way, from your basic brights to cracking eggs to look veined from the color they were submerged in.
The other day my friend Sue shared a recipe on her blog for Marbleized Chocolate Bark. I loved the way this looked so much that I thought it could be fun to recreate something similar for Easter Eggs – only my version was more like Splatter Painting.
Whether you use a large plastic egg mold or smaller ones, the same effect can be achieved. The best part is that the entire family can get involved to create their very own masterpieces. With just a few ingredients needed, these make for a fun afternoon and gift, for a nominal cost.
While I made this egg to be a complete solid egg, you could just use 1/2 the mold, which is more than enough, considering how rich white chocolate is.
Here’s how I made the Splatter Painted White Chocolate Easter Eggs…………………….

Splatter Painted White Chocolate Easter Eggs
A fun project to bring out the kid in everyone!
Ingredients:
- 1 (10 oz.) package of white chocolate chips
- 3-4 packages Candy Melts, various colors
- 1 pkg. Paramount Crystals, if desired
- Easter Egg molds, large enough to show paint design
Directions:
- Wipe clean your Easter Egg molds, making sure they are completely dry.
- In separate small microwaveable containers, place several colored Candy Melts of a single color, into each container. Place in microwave for 3 consecutive 30 second intervals, stirring in between until melted. Add one Paramount Crystal and stir once removed from microwave. This will slightly thin out the Candy Melts. Some of the crystals may be very small so if necessary add another.
- With a Popsicle stick, skewer, or chopstick, dip into the color and drip or drizzle onto the inside of the egg mold. Repeat this process with 3-4 different colors creating a design. Place in the refrigerator for about 30 minutes to harden.
- Using 1/2 the bag of white chocolates, place into a medium size microwaveable bowl. Place in microwave for 3 consecutive 30 second intervals, stirring in between until melted. Once melted, remove mold from refrigerator and carefully pour white chocolate into the mold. If using a large mold 1/2 the bag should fill up one mold, using the other 1/2 bag for the other side. Once filled be sure to smooth off the top and edges so there's no chocolate hanging over the sides. Place in refrigerator for several hours or overnight until completely solidified.
- Remove from refrigerator, turn over, and egg will come out. Be sure to have something underneath to catch the egg as it releases from the mold.
Note: If you want to make one large solid egg: Follow all steps through #4 only using one half of an egg. Once the first egg hardens completely, repeat steps with the second egg. Before placing egg #2 in the refrigerator to harden, place the first egg onto egg #2, flat sides together to adhere, and refrigerate overnight. Remove from molds, and enjoy!!!
Inspired by Sue from: The View From Great Island
Other Projects You Might Enjoy: