Raspberry Pinwheel Cookies

I hope everyone has had a wonderful Thanksgiving, filled with love, laughter and good times with family and friends. This year we celebrated at our sons home and we had quite the feast!
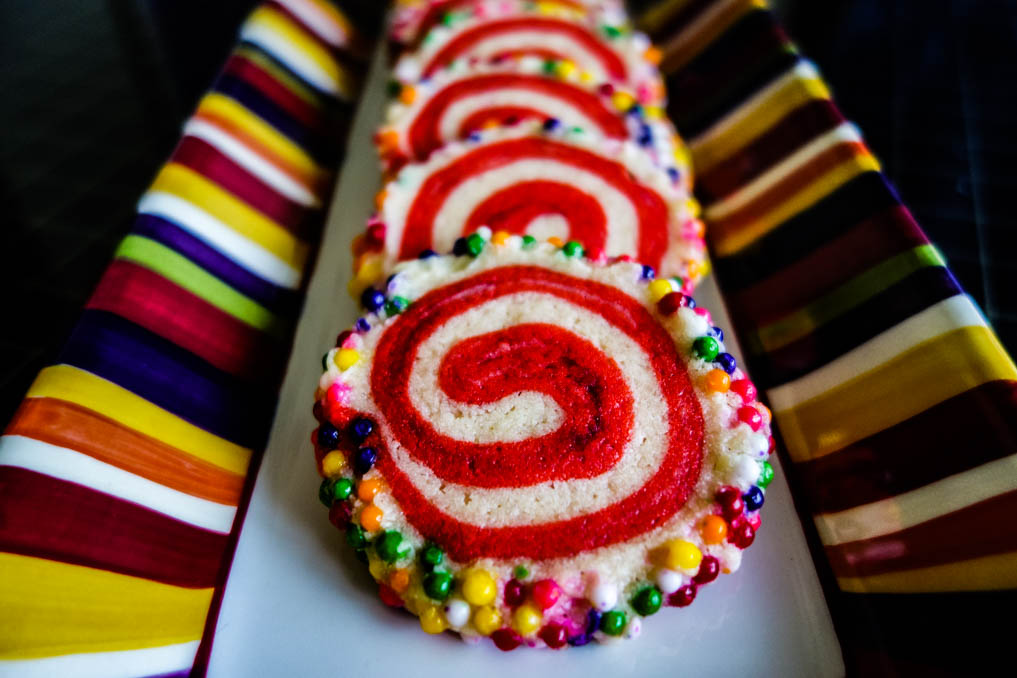
Don’t these Raspberry Pinwheel Cookies look like fun? They remind me of a merry-go-round, happy and whimsical.
When I first spotted these on Sprinkles Bakes years ago, I couldn’t take my eyes off of them. I’ve seen them in Fine Cooking Magazine as a chocolate and vanilla swirl, plus on other blogs in various flavors and colors added into them. These Raspberry Pinwheel Cookies shout out “celebration.” I just knew I had to make them!
While there are several steps, they were quite simple to put together, certainly not as intimidating as they appear.
They say you eat with your eyes first, and these aren’t just pretty and fun to look at, they’re crisp, and buttery with a hint of raspberry flavor – so delicious!
Of course when you make these yourself, you can change up the color, and flavor, to what suits your palate. Best of all, if you don’t want to make the whole batch at once, keep the log in the refrigerator or freeze until ready to use.
I thought these colors would be perfect for the winter holidays, don’t you? I hope you’ll try making these Raspberry Pinwheel Cookies. Be warned, they’ll disappear quickly!

Raspberry Pinwheel Cookies
Ingredients:
- 2 cups unsifted cake flour
- 1/2 tsp. baking powder
- 1/4 tsp. salt
- 2/3 cup unsifted powdered sugar
- 1/4 cup granulated sugar
- 2 1/2 sticks unsalted butter, cold
- 1 tsp. vanilla
- 1/2 tsp. raspberry (or flavor of choice) extract
- 1/2 tsp. (or more if desired) Red gel food coloring (or color of choice)
- 2 tbsp. unsifted cake flour
- 1 1/2 cups multi-colored nonpareil decors (I used Wilton jumbo sprinkles)
Directions:
- Combine the flour, baking powder, salt and sugars in a food processor and process briefly to mix. Add the butter in pieces; process with on/off bursts until the mixture has the consistency of cornmeal. Add the vanilla and process until the mixture just forms a ball.
- Divide the dough into 2 equal portions then return one of the portions to the food processor. Add the raspberry extract, food coloring, and the extra tablespoons of flour to the processor and process until just incorporated.
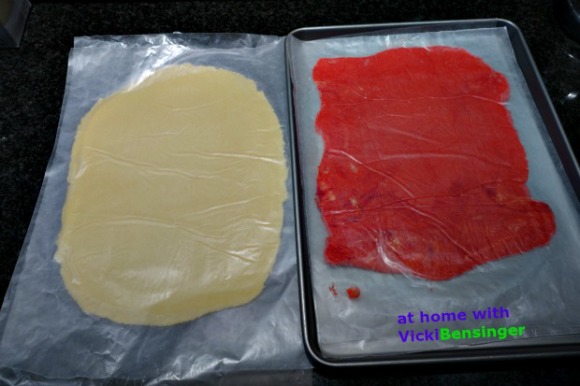
- Roll out each portion of dough between sheets of waxed paper. You want a rectangle about 11 × 8½ inches by ⅛ inch thick. Leave the dough between the sheets of waxed paper and slide onto a baking sheet. Refrigerate until firm, for at least 2 hours or up to 3 days.

- Remove dough pieces from refrigerator. Pour the nonpareil decors into a shallow rectangular dish (such as a 9 × 13-inch pan.
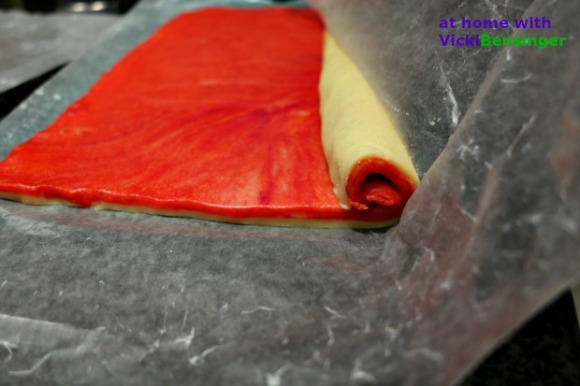
- Peel off the top sheet of waxed paper from both doughs. Brush the vanilla dough very lightly with water. Using the waxed paper, lift the strawberry dough and flip it onto the vanilla dough so they are stacked. Press with your fingertips to seal the two doughs together. Remove the top sheet of waxed paper and trim the edges even.
- When the dough is just pliable (but still cold), roll up the dough(begin with the long side) like a jellyroll. As you begin to roll, gently curl the edge with your fingertips so you don’t get any air pockets as you roll dough into a log. As you roll, the vanilla portion may want to tear, pinch tears together as they happen and keep rolling.

- After forming the dough into a log, throw away the waxed paper. Gently lift the log on top of the nonpareil decors in the dish and roll until the log is completely coated with decors. Wrap the log in plastic wrap and refrigerate until firm enough to slice (from 4 hours to a week, or freeze for up to 2 months; defrost in the refrigerator overnight before slicing).
- Heat oven to 325°. To bake, slice the log into ⅛- to ¼-inch-thick cookies and bake on parchment-lined baking sheets for 15 to 17 minutes, until the cookies are no longer shiny on top and the bottoms of the vanilla portion are golden.

Hungry for more? Savor these!